Many pilots asked me if it is possible to use the Thermal Map while flying. And indeed, this was the initial idea of the whole project. But it is hard to debug when you need to fly in order to test changes. That was even more true in times of Corona when cable cars have been closed and we had to hike up the mountains. This is why the default version of the Thermal Map was created. It is a debug view for being able to easily change the position of the Pin and validate that everything works as expected.
This debug view proved to be useful on its own. It helps with planning an XC flight at home and to understand where Thermals can be expected at what time. Having this information visible during a flight would be even more valuable, of course. In this previous post, I explained what still has to be done in this regard.
Improvements
As you can see in the Changelog on the Thermal Map page, there were lots of smaller updates addressing these problems. A major concern was the performance that had to be massively improved. Fetching thermals for a specific situation is now much faster than before. Especially when the location and time do not change much between requests.
Another issue was the height used. It took the wrong value, but only on the inflight map. That was hard to spot because results were showing on the screen but were less valuable than expected. On my first flight after fixing this issue, the map data has been extremely valuable.

The flight went along a well-known route and I probably could have made it without the map. But knowing exactly where to look for upward winds was a significant advantage. It was much easier to stay high, quickly find the next spot, and get into the real core. And you can benefit from that, as well.
Setup
So how can you see the map while flying? You just need to open this URL:
https://thermik.pumpt.net/?live=true&zoom=11
Personally, I am using XCTrack as my flight tool. With the Pro version, it is possible to add a website widget. It might be possible to show the page in a web browser as well, but you need to figure out how to disable the display timeout and/or other power-saving options. The XCTrack widget should be configured like this:
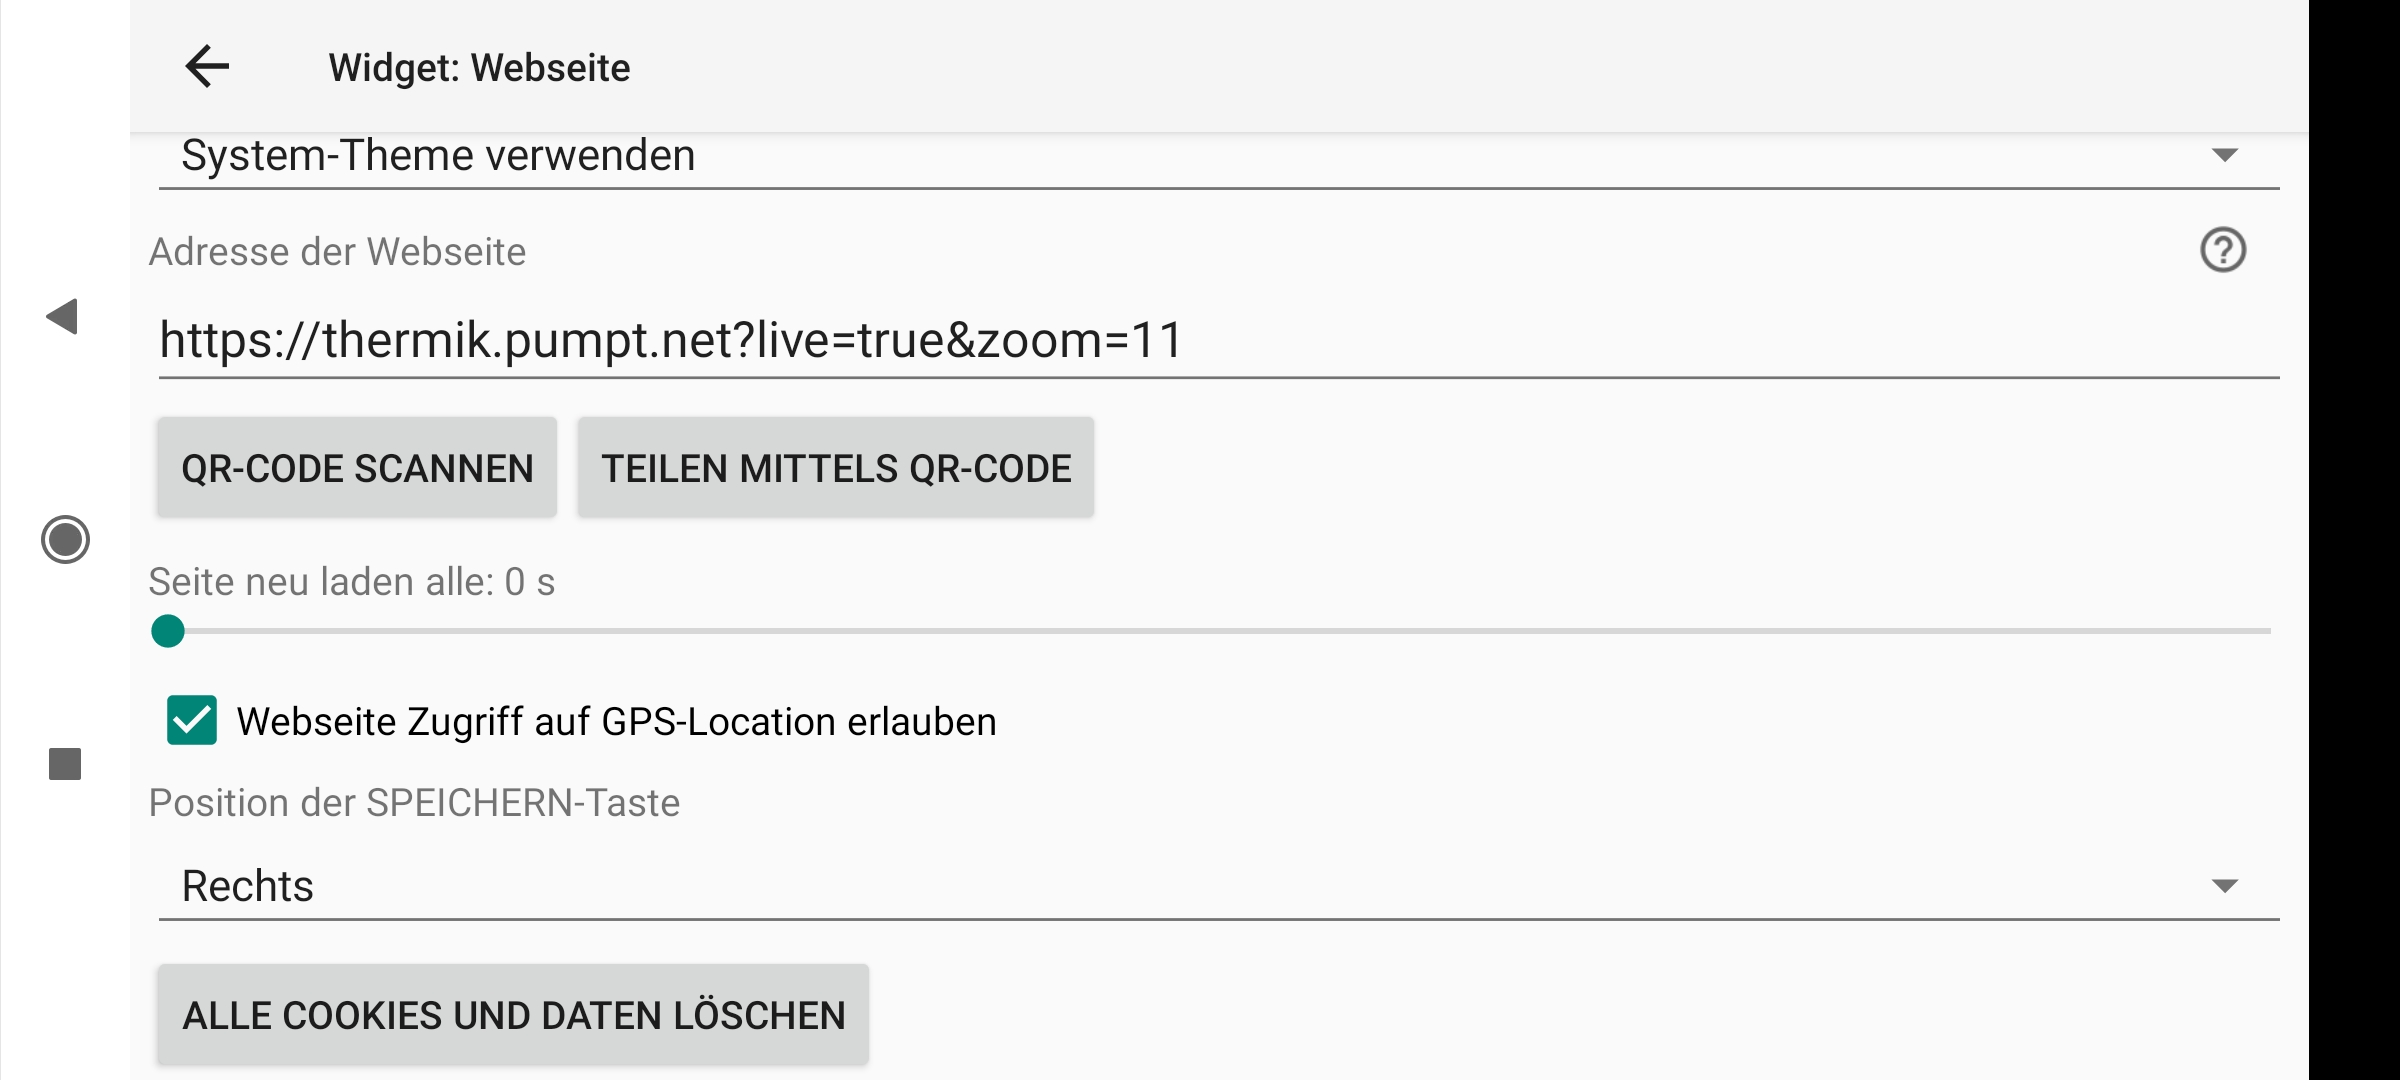
Important is the parameter live=true. The zoom=11 is optional and you can adjust it to whatever works best for you. You do not want to automatically reload the page, so set this value to 0. And obviously, the website requires your GPS position in order to work. So this checkmark should be checked.
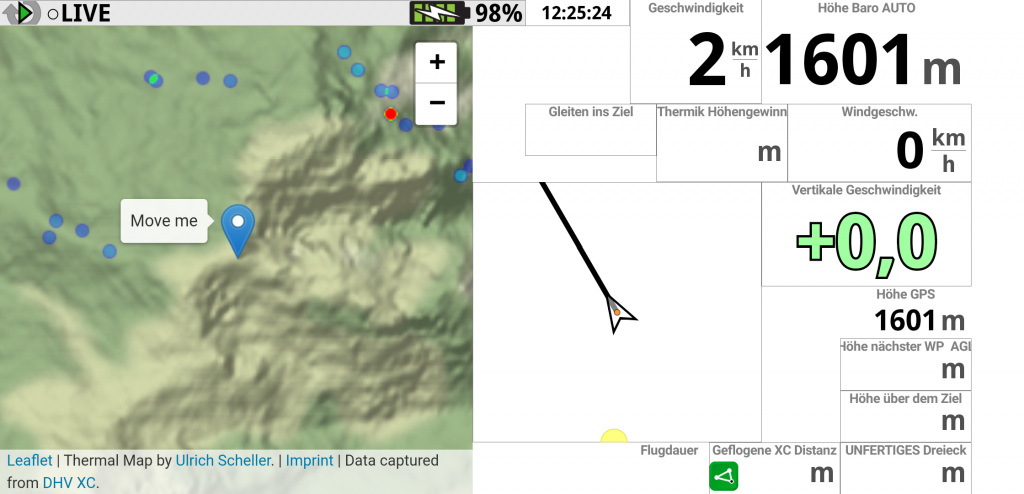
My XCTrack looks like this:
6 Replies to “See the Thermal Map while flying”
Leave a Reply
Related Posts
Thermal Map coverage and updates
The Thermal Map has gained traction in the paragliding community. The well-known German blog Lu-Glidz has written an article explaining how to use it. Usage of the website has peaked after the article was published…
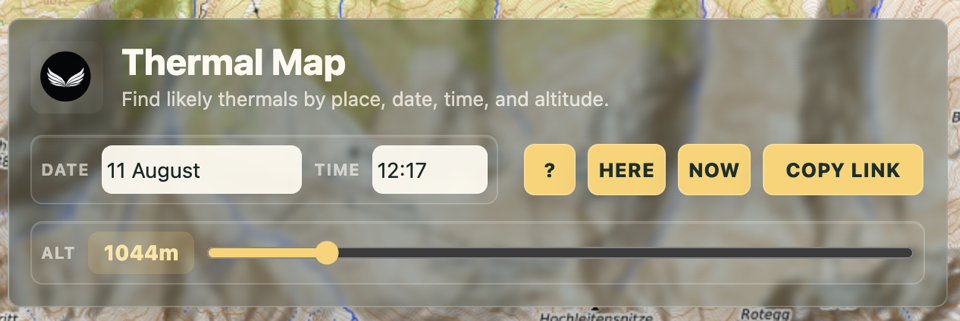
A clearer view: the Thermal Map interface, redesigned
The Thermal Map is most useful when the interface almost disappears. You want to see the terrain, understand the thermal picture, and move through date, time, and altitude without fighting the controls. That was the…

German Paragliding XC Champion
Initially, this website was created to present my professional career and ideas around software development. Recently, with my work on paragliding tracklogs and the Thermal Map, it has also become a personal space. This paragliding…
Hello, I set up this URL in xctrack pro. I get the map OK but the thermals are not there…
With the live=true flag, the map takes your current GPS location and the current time. There is a good chance that you can not reach a thermal when launching from your current position.
Hi Ulrich,
> You do not want to automatically reload the page, so set this value to 0
Could you please explain why? In order to keep the map centered, should not the page be reloaded?
Thank you,
Christophe-Marie
Hi Ulrich,
Would it be possible to support passing the GPS coordinates as url parameters? I am thinking about passing the following url to the widget
https://thermik.pumpt.net/?lat=${lat}&lng=${lng}&zoom=11
I am suggesting this idea because it would enable the map to match the position when replaying an IGC file in XCTrack.
Best,
Christophe-Marie
Hi Christophe-Marie, if the page were reloaded you’d lose the track. The map automatically re-centers whenever the GPS position changes, so a reload isn’t needed.
Hi Christophe-Marie, this would work in principle, but it would always reload the page — which makes it impractical. You can get the current parameters by clicking the “copy Link” button.